Welcome to the Accessible Maker Kit Project!
Parts of the Makey Makey:
Getting to Know Your MakeyMakey..
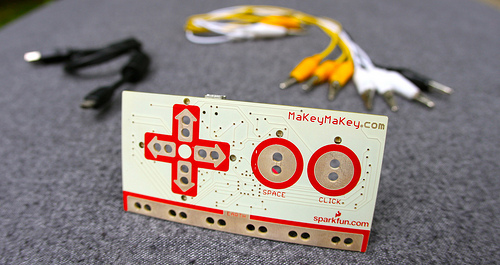
The MakeyMakey is an invention kit that allows you to interact with your computer in novel ways. The MakeyMakey comes with 4 main parts: the board, a thick USB to mini-USB connector, 7 alligator clips, and a bundle of jumper cables.The Board:
Take the MakeyMakey in your hands. You will feel that there is a flat side and a side with rectangles that stick out. Face the flat side towards you. On the back, you should feel that one edge has a shorter, wider rectangle. That is the mini-USB port to connect to your computer. Rotate the board so the mini-USB port is at the top and on the side facing away from you. There are two types of connections that this board supports. On the front side, there are holes for you to clip into using alligator clips. On the back, the skinny, tall rectangles have 6 holes each meant for use with a jumper cable. First, we will go along the bottom of the board, you should feel 12 holes. These are your ground/earth connections. Step 1. Plug the mini-USB cord into the metallic rectangle at the top of your board. Step 2. Connect an alligator clip to a ground set of holes which are all along the bottom of the board. Step 3. Connect an alligator clip to Step 4. Plug the USB end of your cord into your computer. Step 5. Now when you touch the two ends of the alligator clips together and complete the circuit, you will activate a keypress on your computer. Step 6. Try putting different materials (e.g. bananas, people).